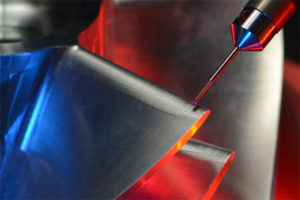
A reliable metrology lab is an essential partner when you need to outsource inspection work. Quick turn around, reasonable prices and skilled engineers on the other end of the phone are critical.
Core competencies:
* Dimensional Inspection / First Article Inspection of contoured geometry using 3-D CAD files. We have a complete selection of software tools for CMM operation and data analysis, including Innovmetric PolyWorks, Zeiss Calypso, Metrolog, Faro CAM2 and VX CAD/CAM. We can accept CAD files from almost any source.
* Fixture alignment and inspection/metrology services at customer facilities using Laser Tracker and Faro Arm equipment. This is ideal for parts that are too large, delicate or difficult to transport to our lab.
* Dimensional Inspection / First Article Inspection of turbo machinery components, including turbine blades, impellers, turbine and compressor wheels, blisks.
* Dimensional Inspection / First Article Inspection of assemblies, both large and small, with GD&T requirements.
* Dimensional Inspection / First Article Inspection of castings, forgings, molded parts and other manufactured parts where special consideration must be given to draft, parting lines, die mismatch, core shift, shrink, die closure, gating, grinding, porosity, etc.
* Dimensional Inspection / First Article Inspection of precision machined parts, including advanced GD&T, complex coordinate systems, best fitting and coordinate transformations
* Polyworks programming (macros and GD&T requirements)
* Zeiss Calypso programming
Geoform, Inc. is an approved vendor for many of the leading manufacturers and research institutions in the U.S. See a list of some of our larger customers here However, the bulk of our work comes from smaller companies who supply these large corporations with parts that ultimately get assembled into their world-class products. We have more than 400 active customers in this category, with a core group of about 20 who send work on a regular basis.
We have extensive experience in preparing well documented inspection reports, using measurement equipment traceable to N.I.S.T. Our reports are provided in Excel and/or PDF format. If you require the aerospace standard AS 9102 format, it will be generated at no additional cost.
We have completed more than 34,000 inspection reports over the last 36 years. The experience level of our staff is unsurpassed in the industry. Between our 4 lead inspectors, we have more than 80 years of collective experience to draw on when presented with a challenging inspection job.
We have worked with every conceivable type of drawing, from crude napkin sketches to World War II era hand-drawn engineering drawings to the latest 3-D CAD files that conform to Boeing DPD/MBD requirements. We are completely familiar with the requirements of Model-Based Definition, where the majority of the part geometry is controlled by a 3-D CAD file and the parts list or view annotations are used for tolerance control and other special instructions.
Our expertise is in Geometric Dimensioning and Tolerancing (GD&T) and drawing interpretation. We have extensive experience in dimensional metrology with a variety of equipment, including Coordinate Measuring Machines (CMM), Portable Measuring Machines (PMM), such as the Faro Arm, Laser Tracker and various surface plate and hand tools. We will always use a common-sense approach in cases where the engineering drawing lacks certain GD&T requirements. This is very common, especially on older drawings and we use our experience to develop datum structures and alignments that make sense. We always re-check any discrepancies, including inspection of the rejected feature on another CMM or with a different type of equipment (hand tools, optical measurements, etc.). If we find a discrepancy, we want to be very sure it’s for real before it goes into the report. If there is any question on our end, we will call your engineer before shipping the job.
Our finished inspection reports typically consist of an Excel file and your engineering drawing in PDF format with bubble numbers (See example). When necessary, we supplement the report with screen-shots, drawings, photos and other information.
Our coordinate measuring machines have capacity up to 60x40x24 inches and accuracy up to +/- .00008 inches. For larger parts, we run Leica and API Laser Trackers and Faro Arm portable measurement machines. These can be transported to your facility for on-site inspection of parts that are too large or heavy to move.
Most of our revenue comes from repeat business. We form long term relationships with our best customers to provide inspection services with the quickest possible turnaround time at the lowest cost. Send us your drawing or other RFQ information and we will send back a quote, usually within 24 hours. In some cases, it may save money to identify particular dimensions that are of interest. If you highlight the drawing dimensions you want measured, it will save a lot of time compared to a full dimensional inspection. You can email drawings to info@geoform.com, or you can fax to 424-292-3410.
